

Before you start
Confirm the business, your customer and credit permissions, and the shop’s approved credit policy. Payments in web navigation opens customer balances and recorded payments. Here, credit means an amount a customer owes for later payment; it is not a gift card or proof that money was received.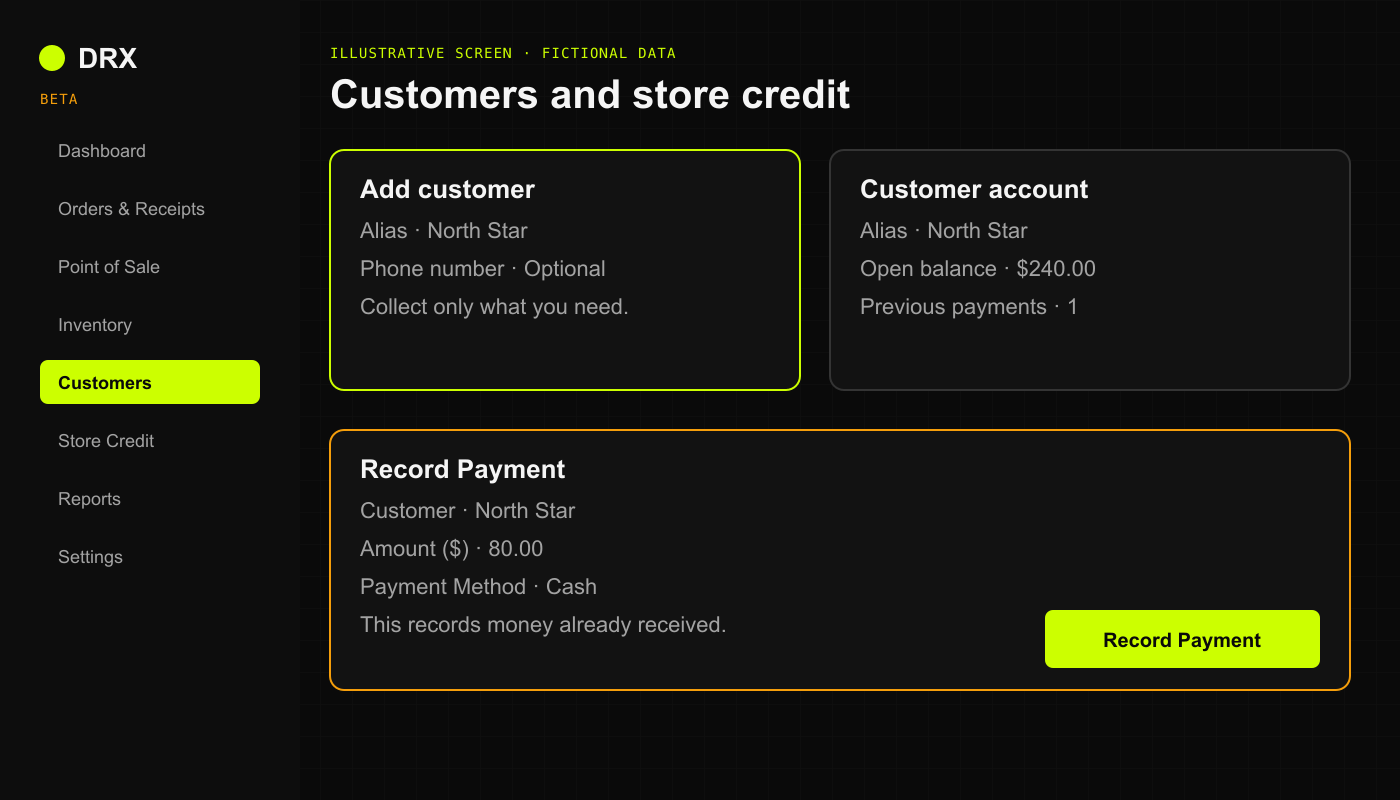
Find or add a customer
- Open Customers and search for an existing profile before adding another.
- Use Add customer when you have permission and no matching profile exists.
- Enter the alias or other details allowed by the business’s privacy settings. Leave unrelated optional information blank.
- Review the fields, choose Add once, and check the saved profile in the same business.
Attach a customer at checkout
- In Point of Sale, use Customer (Optional).
- Enter the existing Alias or an allowed Phone number, then choose Lookup.
- Select the matching customer and confirm Attached: before continuing.
- Choose CREDIT only when offered and approved. Review the total and select Confirm credit charge before Complete Sale.
Record a payment toward an existing balance
- Confirm the payment was actually received through the shop’s approved process.
- Open Payments and choose Record Payment.
- Select Customer, enter Amount ($), and choose the matching Payment Method: Cash, Check, Transfer, or Other.
- Use Notes only for a necessary reference. Do not enter card numbers or account credentials.
- Check the amount and previous payments, then choose Record Payment once.
- Reopen the account and confirm the saved payment and remaining balance before recording anything else.